
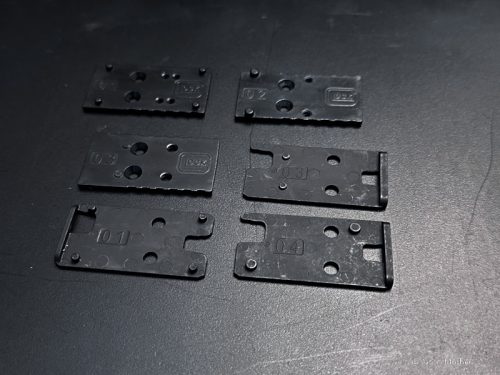
If you’ve ever tried mounting a red dot sight only to discover it doesn’t fit, you already know how frustrating footprint confusion is. Here is a simple guide to red dot footprints that breaks down common footprints clearly so you can quickly understand what fits what and why it matters.
What Is a Red Dot Footprint?
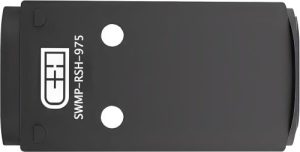
A red dot footprint refers to the specific mounting pattern used to attach a red dot sight to a firearm or mounting plate. It defines the placement of screw holes, recoil lugs, and alignment points. As different manufacturers use different standards, the footprint determines whether an optic will fit directly or require an adapter plate.
Why Footprint Compatibility Matters
Footprint compatibility is critical because even high-quality optics won’t mount properly if the pattern doesn’t match. Using the wrong footprint leads to instability, misalignment, or the inability to mount the optic at all.
Compatibility is important for the following reasons:
- Ensures the red dot sight fits securely on your firearm without modifications.
A matching footprint allows the optic to mount directly onto the slide or plate, creating a stable and precise fit without the need for grinding, drilling, or other alterations. - Prevents wobbling or movement during recoil, improving accuracy.
When the footprint is correctly matched, the optic stays firmly in place even under repeated recoil, helping maintain consistent shot placement. - Reduces the need for costly adapter plates or custom machining.
Proper compatibility means you won’t need extra parts or gunsmith services, which can increase both setup cost and complexity. - Helps maintain proper optic alignment with the barrel for consistent zero.
The right footprint ensures the sight aligns properly with the bore axis, making it easier to zero and keep shots consistent over time. - Saves time when selecting and installing optics.
Knowing your footprint narrows down compatible options quickly, avoiding trial-and-error purchases or installation issues. - Minimizes the risk of damaging the optic or slide due to poor fit.
Forcing an incompatible optic can strip screws, damage mounting surfaces, or even crack the optic housing under stress. - Increases overall reliability in both training and field use.
A secure mounting system performs better under vibration, impact, and environmental changes, making it dependable in real-world use. - Makes future optic upgrades easier when using standard footprints.
Common standards like RMR or RMSc allow you to swap optics more easily without changing the entire mounting setup. - Ensures safe installation by matching the correct screw placement and spacing.
Proper footprint alignment ensures screws engage correctly, reducing the chance of loosening or failure during use. - Improves long-term durability of both the firearm and the optic system. Lastly, a well-matched setup reduces stress on mounting points, helping both the firearm slide and optic last longer with less wear.
The Most Common Red Dot Footprints
Red dot sights come in different footprints. Each footprint serves different firearm types and use cases, so matching the correct one is essential for secure mounting and optimal performance.
- Trijicon RMR Footprint. This is one of the most widely used standards in the industry, known for its strength and durability. It is commonly found on full-size pistols and duty-grade optics, offering excellent recoil resistance and broad compatibility across many brands.
- Shield RMSc Footprint. Designed for compact and subcompact pistols, this footprint is popular for concealed carry setups. Its smaller size makes it ideal for slim slides while still maintaining reliable mounting stability.
- Leupold DeltaPoint Pro Footprint. These footprints are often used on larger optics and performance-oriented handguns, where they provide a secure mounting system with a slightly different screw and recoil lug arrangement compared to RMR-style cuts.
- Docter / Noblex Footprint. Next, is the Doctor/Noblex Footprint. This is a long-standing standard used by several manufacturers, especially in older or European-designed optics. It is still supported by many modern adapter plates and mounting systems.
- Aimpoint Micro Footprint. This footprint is commonly used on rifle red dots rather than pistols. It is known for its rugged design and is widely used in tactical and sporting applications.
- C-More RTS / STS Footprint. Next, we have the C- MORE RTS footprint. It is frequently found on competition-style pistols and is designed for speed and quick target acquisition.
- ACRO (Closed Emitter) Footprint. Acro footprints are designed for enclosed emitter optics. They are built for extreme durability and environmental resistance, often used in professional and defensive applications.
- Holosun K-Series Footprint. Lastly, the Holosun K-series footprint is a compact, modern footprint used in many slim red dots. It is similar in size to RMSc but includes slight variations depending on the model.
Related:
A Simple Guide to Red Dot Footprints: Common Compatibility Mistakes to Avoid
- Assuming all optics are universal. Many users think any red dot will fit an “optics-ready” slide, but each slide is cut for a specific footprint, and mismatching leads to installation failure or instability.
- Ignoring footprint differences that look similar. Some footprints (like RMSc and Holosun K-series) appear almost identical but have slight variations that affect fit and screw alignment.
- Forcing an incompatible optic onto a slide. Trying to mount the wrong footprint can damage screw threads, recoil lugs, or even crack the optic housing under pressure.
- Overlooking adapter plate requirements. Skipping the need for an adapter plate often results in poor alignment or an optic that cannot be mounted securely.
- Using incorrect screw lengths or thread types. Screws that are too long can damage internal components, while short screws may not secure the optic properly.
- Not checking manufacturer compatibility charts. Many buyers skip official compatibility guides and rely on assumptions, which leads to avoidable mismatches.
- Failing to verify slide cut type before purchase. Some pistols require factory-specific cuts, while others are universal-ready. Confusing the two leads to ordering the wrong optic.
- Improper torque during installation. Over-tightening strips threads, while under-tightening causes the optic to loosen under recoil.
- Skipping thread locker application. Without a proper thread-locking compound, screws may loosen over time due to vibration and recoil.
- Ignoring co-witness height considerations. Even if the footprint matches, wrong mounting height blocks the iron sights or affects shooting alignment.
Installation Tips for Proper Alignment
- Clean the mounting surface thoroughly. Remove oil, dust, and debris from the slide and optic base so the red dot sits flat and secure without any gaps that could affect alignment.
- Confirm footprint compatibility before starting. Double-check that the optic and slide share the same footprint or that the correct adapter plate is installed to avoid misalignment issues.
- Dry-fit the optic first. Place the sight on the slide without screws initially to ensure it sits flush and aligns properly with the mounting holes and recoil lugs.
- Use the correct screws and hardware. Always use manufacturer-supplied or recommended screws, as incorrect lengths or thread types can shift alignment or damage the optic.
- Apply thread locker correctly. Use a small amount of medium-strength thread locker on screws to prevent loosening under recoil while avoiding excess that could interfere with threads.
- Tighten screws evenly and gradually. Alternate between screws when tightening to ensure even pressure across the optic base, preventing tilt or uneven seating.
- Follow proper torque specifications. Use a torque wrench if possible and stick to manufacturer-recommended values to avoid over-tightening or under-tightening.
- Verify zero after installation. Once mounted, test and adjust the optic at the range to confirm accurate point-of-impact alignment with your firearm.
Maintenance Tips for Mounted Optics
- Regularly check mounting screws for tightness. Recoil and repeated use can gradually loosen screws, so inspect them periodically to ensure the optic remains firmly secured and properly aligned.
- Keep the lens clean using proper tools. Use a microfiber cloth or lens-safe brush to remove dust, fingerprints, and debris. Avoid rough materials that could scratch the glass or coatings.
- Inspect for signs of wear or movement. Next in this simple guide to red dot footprints, look for any shifting, wobbling, or unusual gaps between the optic and slide, as these can indicate mounting issues that need immediate attention.
- Protect the optic from harsh environmental exposure. When not in use, store the firearm in a dry, dust-free environment to prevent moisture buildup, corrosion, or fogging of the lens.
- Avoid overexposure to harsh chemicals or solvents. Cleaning agents used on firearms can damage lens coatings if applied directly, so always clean the optic separately with appropriate products.
A Simple Guide to Red Dot Footprints FAQs
- How do I know which footprint my firearm uses?
Check your firearm’s manual, manufacturer website, or slide specifications. If it is optics-ready, it will usually specify the compatible footprint or mounting plate system.
- Can I mount any red dot on any pistol?
Not directly. You must match the optic footprint to the slide cut or use a compatible adapter plate if the footprints are different.
- Is it better to use a direct mount or an adapter plate?
It depends on your use case. Direct mounting is generally more stable and lower-profile, but adapter plates offer greater flexibility when mixing different optic and slide systems.
Final Thoughts on Choosing the Right Footprint
Hopefully, you have found this guide comprehensive and insightful. Understanding red dot footprints is essential for building a reliable and flexible optic setup. Once you know your footprint system, selecting compatible optics becomes much simpler, reducing guesswork and improving shooting performance.